The rhythmic heartbeat of rock and metal music lies in the thunderous resonance of punchy drums. Crafting a mix that captures the raw energy and impact of these genres can be a daunting task.. Buckle up, and let’s plunge into the intricacies of crafting drum mixes that resonate with the intensity of rock and metal.
In the vast realm of music production and mixing, there exists no one-size-fits-all approach. The essence lies in achieving a sound that resonates with your artistic vision. Don’t shy away from experimenting with unconventional techniques to break free from the constraints of conventional mixing “rules.” Trust your instincts, embrace innovation, and strive for the modern, hard-hitting rock drum sound that sets your production apart.

Replacing Drums with Samples: A Controversial Yet Effective Technique
Drum replacement is a secret weapon for swiftly attaining the desired punchy sound. The advantages are manifold, from improved sound quality to simplified processing.
Why Use Drum Samples?
Sound Quality: Quality drum samples often require minimal processing, making them ideal for poorly recorded drums.
Isolation: Samples eliminate bleed issues, providing a cleanly isolated track for each drum element.
Flexibility: Drum replacement allows you to choose the right sound from the start, enhancing the overall mix.
Is Drum Replacement Cheating?
Far from cheating, drum replacement is an art. It becomes essential when faced with recording limitations, unusable tracks, or a need for efficiency in achieving the intended sound quickly.
How to Use Drum Samples?
Initial Balance: Achieve an initial mix balance using only faders and panning.
Sample Selection: Choose samples that fit well in the mix context, considering the interplay with other instruments.
Tom Processing: Address rumble, boxiness, and ring in toms through EQ and filtering.
Compression: Apply compression settings used for the snare to enhance punchiness.
Clipping/Limiting: Experiment with both techniques to fatten up the sound while controlling dynamics.
Mix Prep for Drums: Setting the Stage
Before plunging into individual drum elements, certain preparatory steps ensure a solid foundation for the mixing process.
Pan Toms And Cymbals: Overheads Placement: Pan overheads hard left and right for a wider stereo image.
Toms and Cymbals: Align toms and cymbals with the overheads’ stereo image for cohesion.
Set Drum Levels: Maintain consistent levels for kick, snare, and toms, ensuring a balanced mix. Carefully balance cymbal levels, considering the desired intensity and presence in the mix.
Mixing Rock Drums: The Power of Individual Elements
Now that the drums are prepped, the focus shifts to individual elements, starting with kick, snare, and toms.
The Art of Punch: Uplifting Your Kick Drum for Maximum Impact
Sample Selection: Choose a kick sample that fits well in the overall mix.
Subtractive EQ: Use minimal subtractive EQ, focusing on the right sample selection to avoid excessive adjustments.
Compression: Apply compression with a slow attack and fast release for an upfront and aggressive impact.
Ratio Experimentation: Experiment with different compression ratios to adjust the intensity of the kick.
How to Get A Punchy Snare Sound

Sample Compatibility: Choose a snare sample that complements the mix.
Minimal EQ: Use minimal subtractive EQ, relying on sample selection for an ideal sound.
Compression: Copy compression settings from the kick and adjust to taste, focusing on attack time for a fatter sound.
How To Get Punchy Toms?
EQ Clean-Up: Address rumble, boxiness, and ring in toms through filtering and EQ.
Compression: Apply the same compression settings used for the snare, adjusting toms individually.
How to Make Drums Sound Fatter? Adding Depth and Richness
Clipping or limiting on individual drum elements contributes to a fatter sound while maintaining control over dynamics.
Drum Bus Processing: Drum Bus Compression: Apply aggressive yet subtle compression to glue individual elements together.
Saturation: Experiment with saturation in parallel, adding grit and character to the overall drum sound.
Limiting Consideration: Decide whether to use a limiter on the drum bus based on the desired sound and use of saturation.
Crafting an Immersive Drum Mix: Elevating the Entire Soundstage
Now that the individual elements are honed, it’s time to focus on creating an immersive and cohesive drum mix.
Drum Bus Compression
Begin with aggressive compression on the drum bus to glue the elements together. Utilize a high ratio, high gain reduction, fast attack, and fast release. Blend in the compressed signal using the mix knob for subtle thickness and energy.
Should I Use Parallel Compression on Drums?
By incorporating a compressor equipped with a mix knob, we’ve essentially implemented a form of parallel compression on the drum tracks. However, you can absolutely explore traditional parallel compression for additional control and creative possibilities.
Drum Bus Saturation
For those feeling adventurous, add a touch of saturation directly to the drum bus. Use a saturator with a mix knob, dialing in aggressive settings and pulling back the mix for added grit, character, and dynamic control.
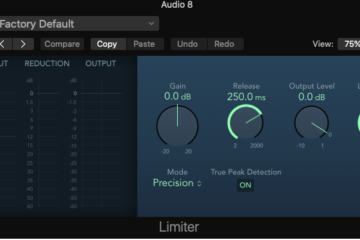
Is It Advisable to Add a Limiter to My Drum Bus?
While saturation can naturally control dynamics, consider adding a limiter to the drum bus for a tight leash on overall dynamics. Decide based on your preference for a cleaner sound or the desire for controlled consistency.
Your Roadmap to Punchy Drum Mastery
Mixing punchy drums for rock and metal involves a systematic approach that combines drum replacement, careful sample selection, and strategic processing. By following this detailed guide, you’ll be equipped to achieve a massive, punchy drum mix that raises your rock and metal productions. Clinch to experimentation, trust your ears, and let the drums drive your mix to new heights. Give this method a try, and you’ll be thanking yourself later for the powerful results it delivers. Happy mixing!
0 Comments